Dependency Injection – .Net Core – Part I
Topics:
- Dependency Injection Pattern – What is it?
- Dependency Injection in a net core console project
- Service’s lifetime
- Container & Provider
- Creating our own Context
- Registering service with Factories
.Net Core supports the Dependency Injection (DI) Pattern, which is a technique to achieve Inversion of Control (IoC) between classes and their dependencies.
You don’t need another Dependency Injection External Library because it’s a built-in feature in dotnet core.
First, what is a dependency?
A dependency is any object that is required for another object.
What is Dependency Injection?
Basically, we have two important principles to define Dependency Injection:
“High-level modules should not depend on low-level modules. Both should depend on abstractions.“
“Abstractions should not depend upon details. Details should depend upon abstractions.“
Agile Principles, Patterns, and Practices in C# – Robert C. Martin and Micah Martin
Of course, by “abstraction” we understand: Interfaces or Abstract classes.
And by “Details” we understand: concrete classes.
Let’s code! 😀
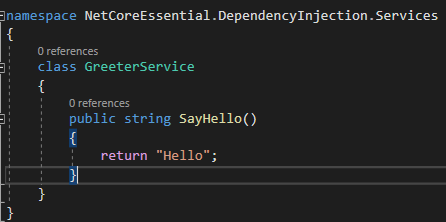
In our case, we have a GreeterService class. This class have only one method at the moment, SayHello().
On the other hand, we can see the main class:
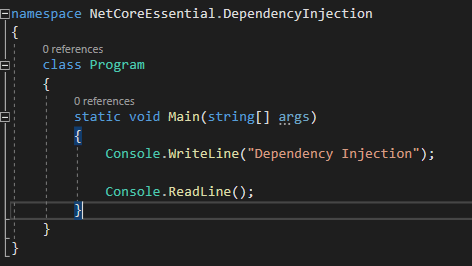
None of these classes have dependencies. However, what happened if I want to greet somebody?
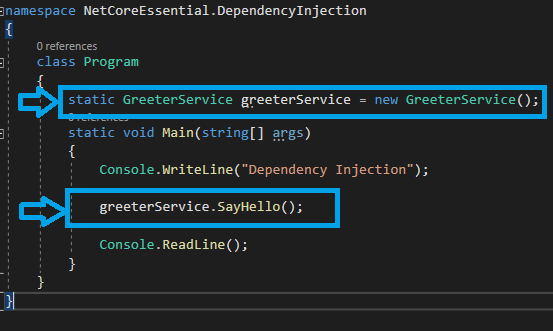
Now, our main class depend on GreeterService or in other words, GreeterService is a dependency of the main class.
We instantiated directly our GreeterService and this way is not a good strategy if we think in scalability.
When we do that, our code is became DEPENDENT on other components or in other words, the COUPLING INCREASE.
We should avoid this situation for the following reasons:
- To replace GreeterService with a different implementation, the main class must be modified.
- If GGreeterService has a lot of dependencies, they must be configured by the class. Furthermore, GreeterService class is responsible for the lifetime of its dependencies.
- This implementation is difficult to do unit testing because our code uses concrete classes.
Dependency Injection can help us with these problems:
- Don’t use concrete classes –> Use Interfaces or Abstract classes
- Delegate the creational and the dependencies lifetime to a CONTAINER. You should register dependencies in a service container. NET CORE provides a built-in container (IServiceProvider).
- Dependency Injection by constructor! Inject services into the constructor of the class where it’s used! The container is responsible to create an instance of the dependency and disposing of it when it is no longer needed.
Dependency Injection in Console app 😮
Our first example will be a Net Core Console App because many times people think that dependency injection built-in feature can be used only in a WEB CONTEXT (ASP.NET CORE) but that is not correct. However, mostly you will use that feature to create a web app or API.
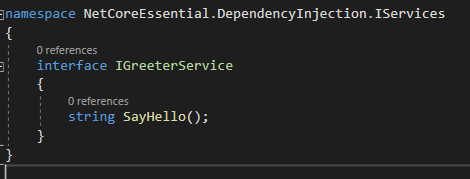
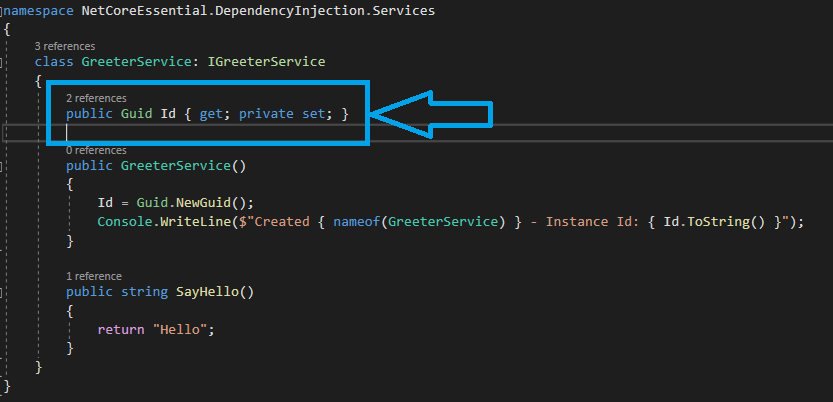
Ok, I created a new interface: IGreeterService. The class GreeterService implements IGreeterService.
In addition, the GreeterService has an unique Id.
Ok, let’s start!
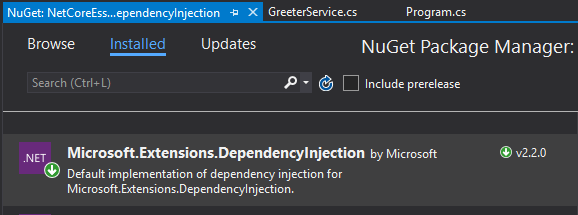
The first is to install the Dependency Injection Package.
This step is not necessary for asp.net core project but it is a requirement in a console project to use the Container.
Register services in the container & services lifetime
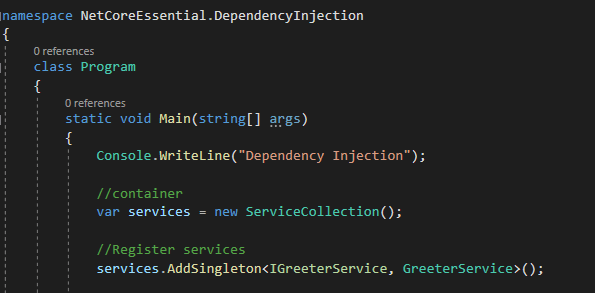
Then we need to create our container and register all our services in.
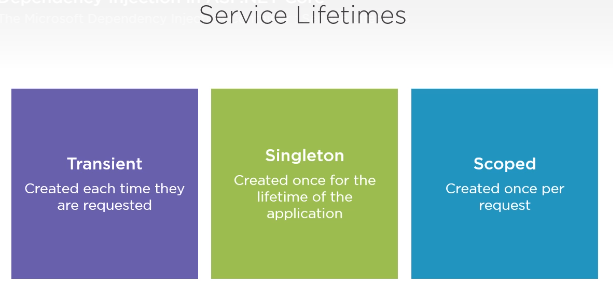
We can register differents kind of services depend on their LIFE-TIME:
- SINGLETON: Always the container returns the same instance.
- Must be thread-safe
- TRANSIENT: Always the container returns a different instance. Transient lifetime services are created each time they are requested from the service container.
- SCOPE: The container returns a new instance PER REQUEST.
- In a Console Project, this type of life-time is the same as Singleton because you don’t have requests in Console apps, it’s always the same thread.
Ok, in our main class will be the Container, ServiceCollection Instance and we will register our services in.
Create Provider & Singleton life-time
When we registered our services, the next step is requested the services to the container but we can’t do that directly, we need to ask the container through the Provider.
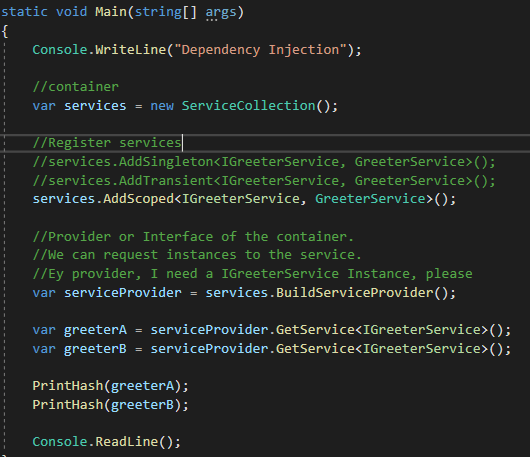
In our case, we registered the Greeter service as a Singleton. We will test that:
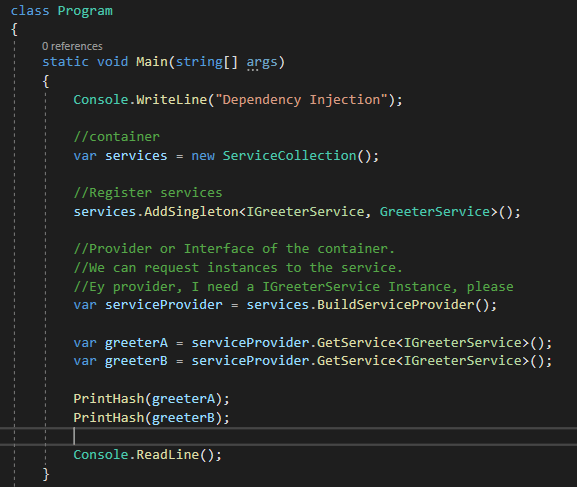
We ask the provider for 2 instances of IGreeterService but this service is registered as Singleton in the Container because of the container should return the same instance, in other words: greeterA and greeterB should be the same instance/object. Furthermore, both classes must have THE SAME HASH CODE and the constructor must execute ONLY ONE TIME.
Magic! The constructor is called just one time and both classes have the same hash code because they are the same class!
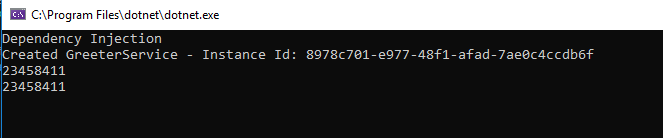
Transient lifetime
In this case, the container should return us different instances of GreeterService because Transient lifetime generates new instance in each time when it is requested.

Magic! The container created two instances of Greeter ! We can see how the constructor is called two times and each instance has different Id and Hash code!
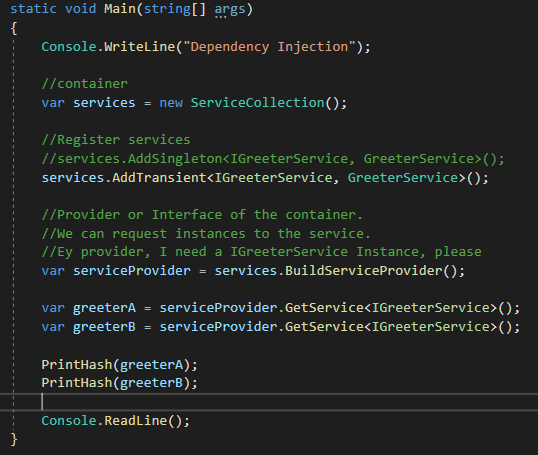
Scoped lifetime – Console App

We can see how the container returns the same object! But remember, it applies only in Console app projects! In a Web Environment, the time life SCOPE will create instances PER REQUEST!
Create our own SCOPES
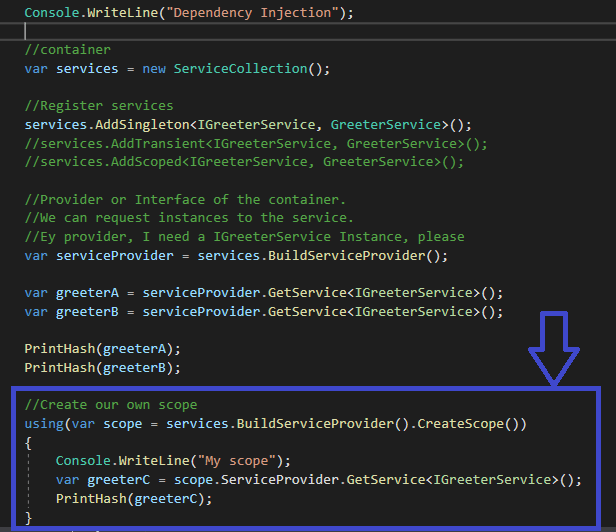
You can use it, maybe in a multi-tenant context.
When you create your own scope the serviceProvider only can see objects inside the scope.
In this case, for example, outside the scope, we have the greeterA and the greeterB. They are the same object because IGreeterService was registered as SINGLETON. The question is: What happened inside the new scope when the service provider returns an instance of IGreeterService ??
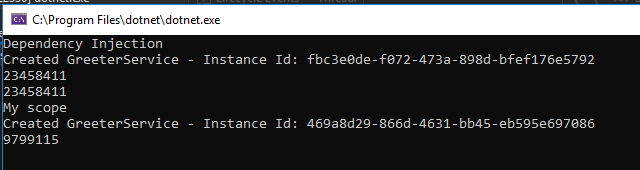
Yeahh! You can see how inside the new scope, the container created a new instance! Magic 😉
The container in our own context doesn’t know the instances outside in.
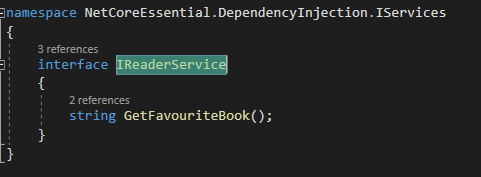
Services with parameters in their constructors – Factory
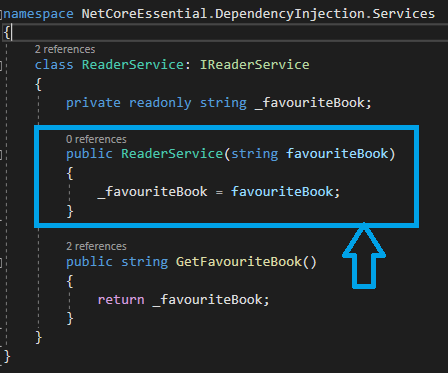
Ok, we will create a new service: ReaderService and its Interface. Basically, a reader has a favourite book and we need to show it.
Finalley, we register the service in the container:

Ok, that looks well but, Reader service expects a favourite book as a parameter, for this reason, we will have a beautiful exception when we run this program:
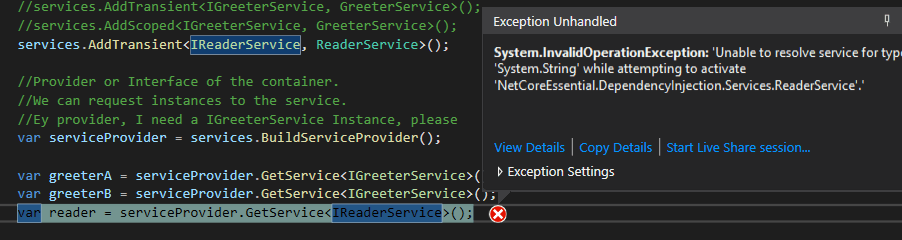
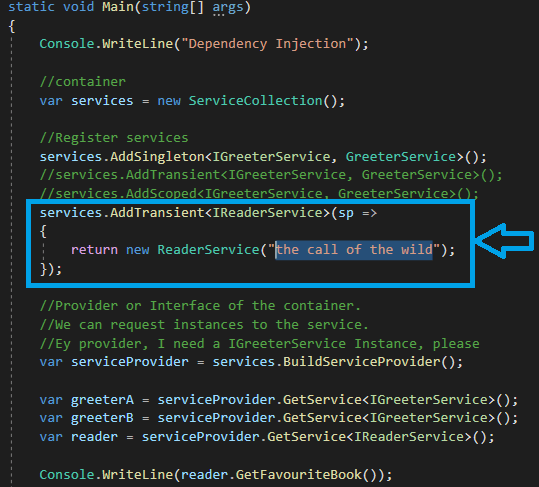
The container can’t resolve the string parameter that Reader Service needs it. For these cases, we can use the Factory overload when we register a service:

We need to implement a Factory and pass the parameter to the service.
We will delegate the responsibility to create the instances to the Factory.

This feature is so useful, for instance, when you need to get from the request any header and create an instance of service with that information.
Ok, that’s all for the first part!
I hope It helps you to use this really useful DI Container 😉
Big hug 😉
Code on Github 😉
2 thoughts on “Dependency Injection – .Net Core – Part I”
Leave a Reply
You must be logged in to post a comment.
Magnificent web site. Plenty of useful info here. I am sending it to some friends ans also sharing in delicious. And of course, thank you in your sweat!
you’re really a good webmaster. The site loading speed is amazing. It seems that you are doing any unique trick. In addition, The contents are masterwork. you have done a magnificent job on this topic!