Serve Angular app over HTTPS (Localhost – Angular CLI)
Sometimes, we need to run an Angular App over HTTPS in localhost for testing a PWA, interacting with Identity Provider as Identity Server 4, so on.
Angular CLI can help us to do this requirement but first, we need to create our localhost certificate.
Step 1 – Creating a certificate
You can create your own certificate but Why you do reinvent the wheel? I recommend you using this great repository:
https://github.com/RubenVermeulen/generate-trusted-ssl-certificate
git clone https://github.com/RubenVermeulen/generate-trusted-ssl-certificate.git

cd generate-trusted-ssl-certificate

bash generate.sh
You should now have a server.crt and a server.key file in the repository folder.
Step 2 – Installing the certificate in Windows
- Double click in the certificate (server.crt)
- Click in “Install certificate“
- Store it at the Machine level
- Next & Select “Place all certificates in the following store“
- Browse ==> Select “Trusted Root Certification Authorities“
- Ok, next & finish.
Perfect, the certificate has already been installed 😀
Step 3 – Configuring Angular CLI to run the app over HTTPS
We use the ng serve command with the following option to serve an https app:
- –ssl= true ==> Serve using HTTPS | Default: false
- –sslCert= sslCertPath ==> SSL Certificate to use for serving HTTPS | sslCertPath: it is the certificate location.
- –sslKey= sslKeyPath ==> SSL Key to use for serving HTTPS | sslKeyPath: it is the private key location.
We create an SSL Folder at SRC Folder level and then, we copy the private key (server.key) and the certificate (server.crt) in.

After that, we are already prepared to run our app over HTTPS, we use the following command:
ng serve --ssl true -o --sslKey ssl/server.key --sslCert ssl/server.crt
Our site runs over https in localhost but we need to write a lot of options when we want to serve the app:

To avoid to write the option ssl | sslCert | sslKey each time that we want to run this app over https, we can configure the angular.json file.
We need to add:
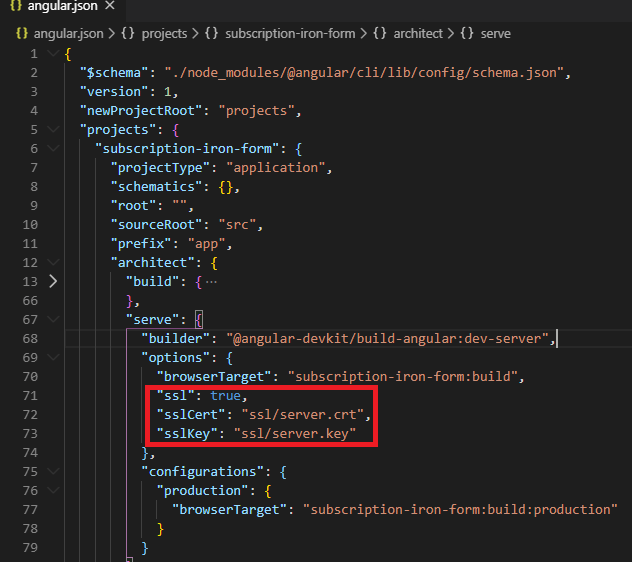
Finally, we can use one of these commands to run the app over https:
> ng s -o
or
> ng s
or
> ng serve
and Angular CLI will add the SSL Configuration by default
Alternative to install the certificate
Sometimes, we have a certificate and we can’t or don’t want to use the double click wizard.
In this case, we need to use the Microsoft Management Console (MMC)
- Press Windows+ R ==> write: “mmc” ==> enter
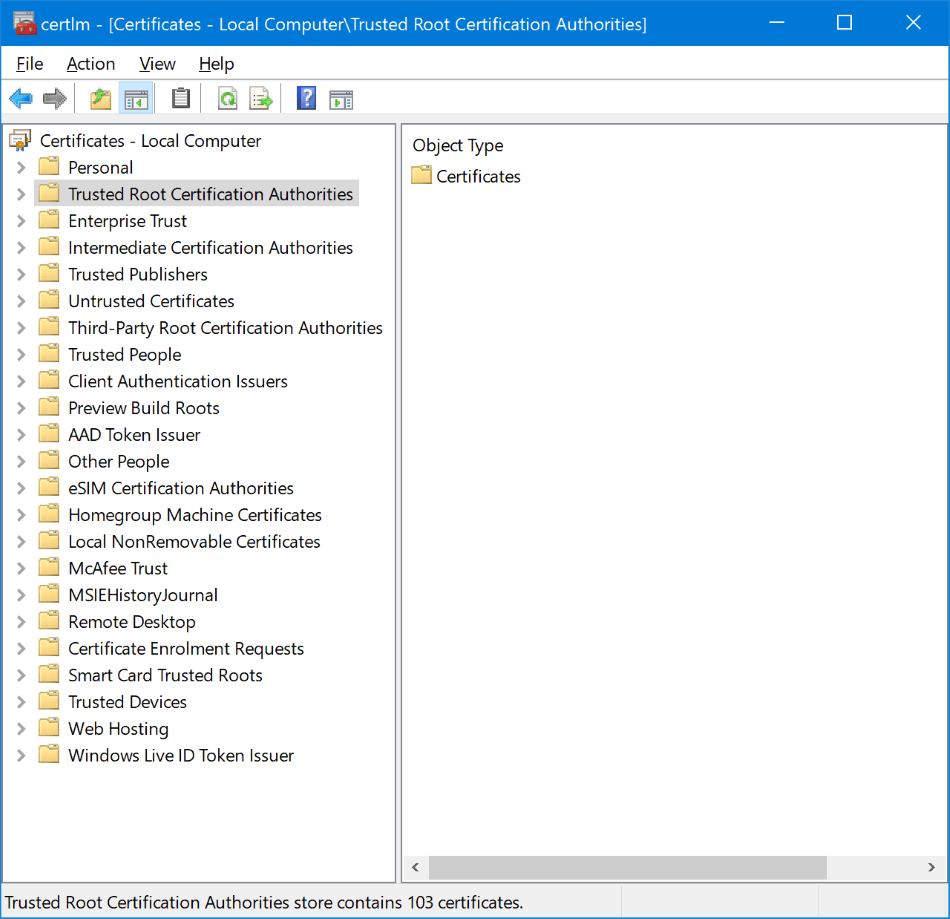
- You have to see the Local Computer Certificate
If you don’t see a similar view as the picture. You have to follow these steps:
- Go to File (in the menu) ==> “Add or remove snap-ins“
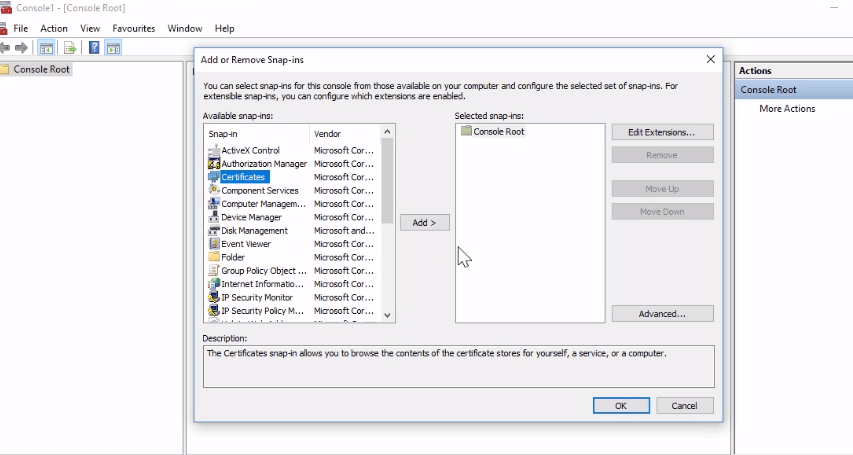
- Select “Certificates” and click “Add >” button

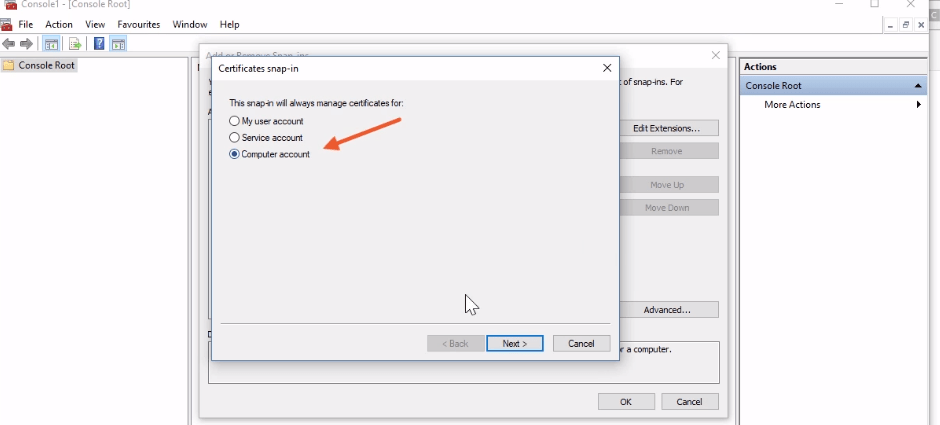
- Select “Computer account” ==> next & finish
3. Select “Certificates” folder
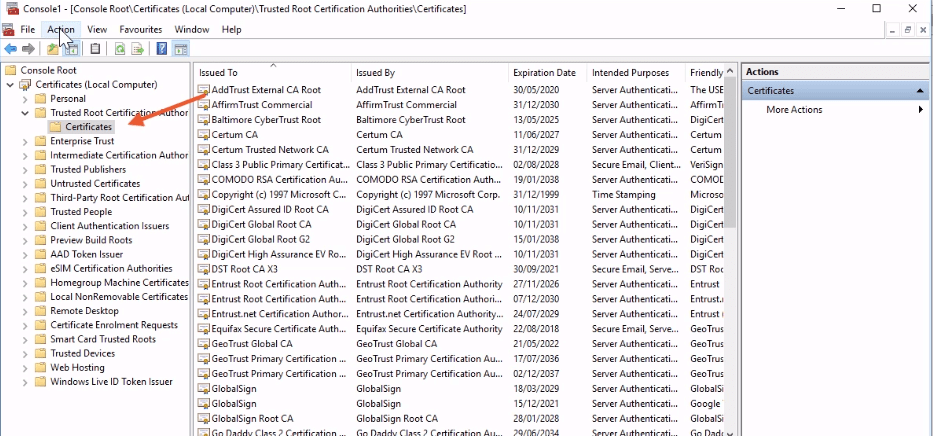
4. Go to the Menu ==> Click in Action ==> All tasks ==> Import
5. Accept the default store location: “Local machine“
6. Browse to the Certificate location (server.crt) ==> next & finish
7. Close all browsers & when you open them again. They trust in the Localhost Certificate
In this view, you can check the expiration date of our localhost certification, usually, when a browser doesn’t trust in our own certificate, the problem is that certificate is not in the trusted certificate section.
That’s all!
Big hug!
1 thought on “Serve Angular app over HTTPS (Localhost – Angular CLI)”
Leave a Reply
You must be logged in to post a comment.
Great content! Super high-quality! Keep it up! 🙂